SSD_Power Consumption Adjustment
1. Enable/Disable Component
1.1. Optional Component
Optional components enabled on Ikayaki: Analog Power, ETH, Audio, Sensor, SDCARD, USB and DISPLAY(Panel).
1.2. Analog Power
The corresponding analog circuit is mainly closed here to reduce power consumption.
1.2.1. Switchable items
Adjustable items: Audio/EMAC/ MIPI DPHY TX TOP/ MIPI DPHY RX /USB20 P1 corresponded kernel config are as follows, please disable and set them to y.
# CONFIG_ANALOG_PD_AUDIO is not set       ->Audio
# CONFIG_ANALOG_PD_EMAC is not set        ->EMAC
# CONFIG_ANALOG_PD_MIPI_DPHY_RX_TOP is not set   ->MIPI sensor
# CONFIG_ANALOG_PD_MIPI_DPHY_RX_SRIO0_3 is not set
# CONFIG_ANALOG_PD_MIPI_DPHY_RX_ SRIO4_7 is not set
# CONFIG_ANALOG_PD_USB20_P1 is not set     ->USB

1.3. ETH
Make adjustments to U-Boot and Linux Kernel to completely close the component.
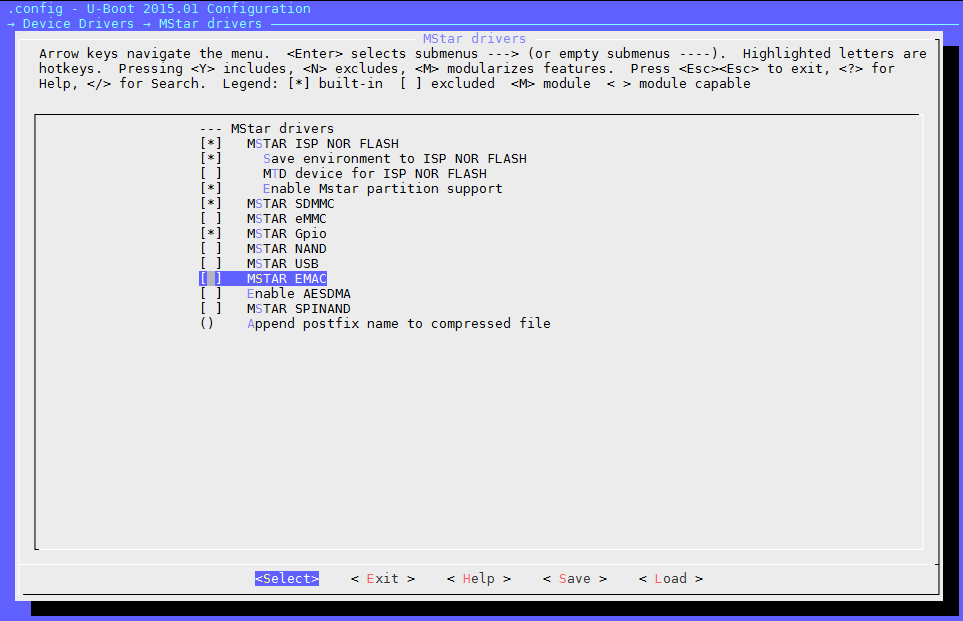
1.3.1. Adjust U-Boot
-
Deselect MSTAR EMAC
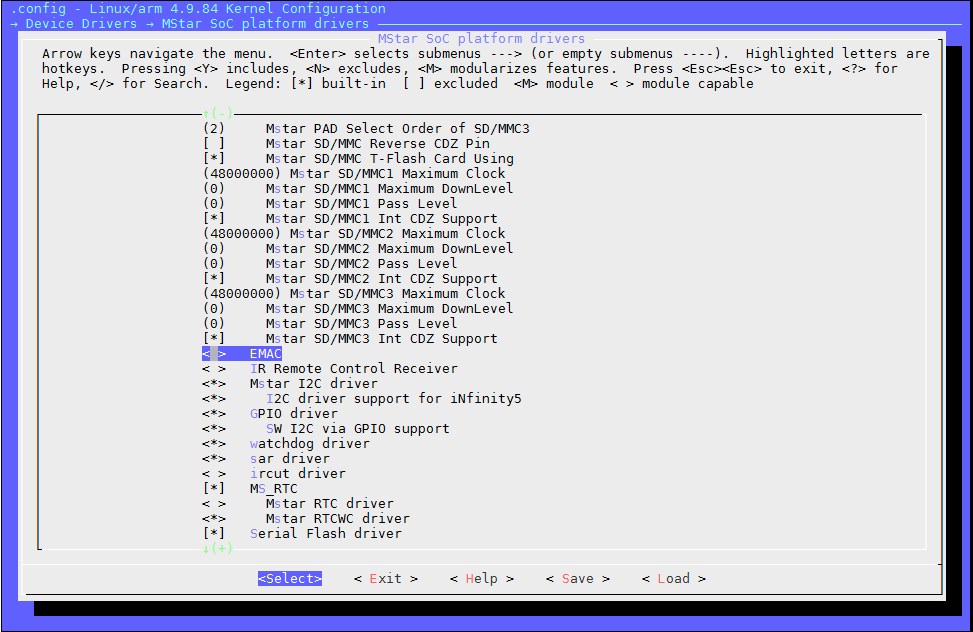
1.3.2. Adjust Linux Kernel
-
Power off the analog circuit.
Refer to 1.2.1 to enable CONFIG_ANALOG_PD_EMAC
-
Deselect EMAC
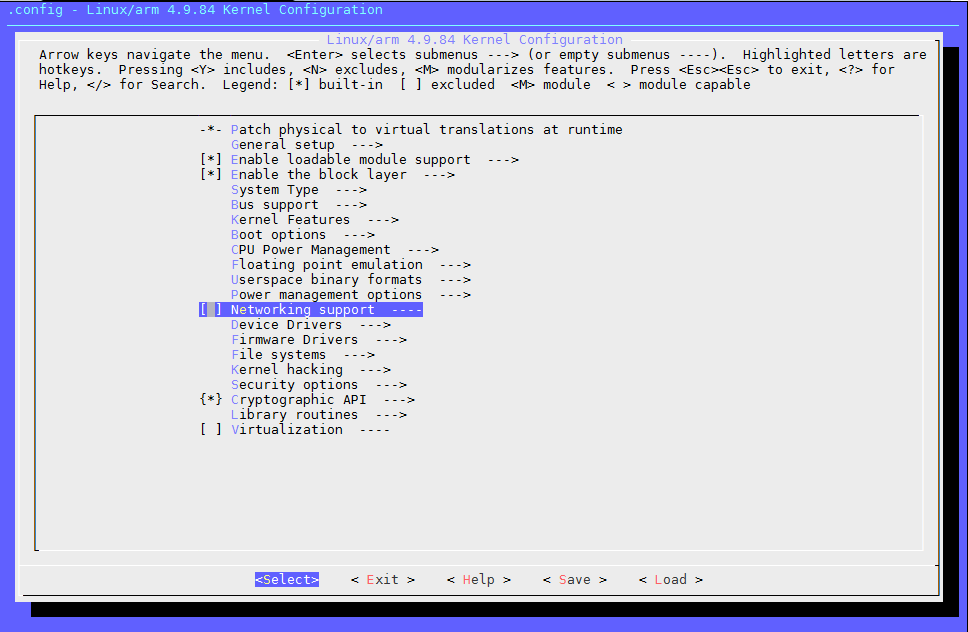
-
Deselect Networking support
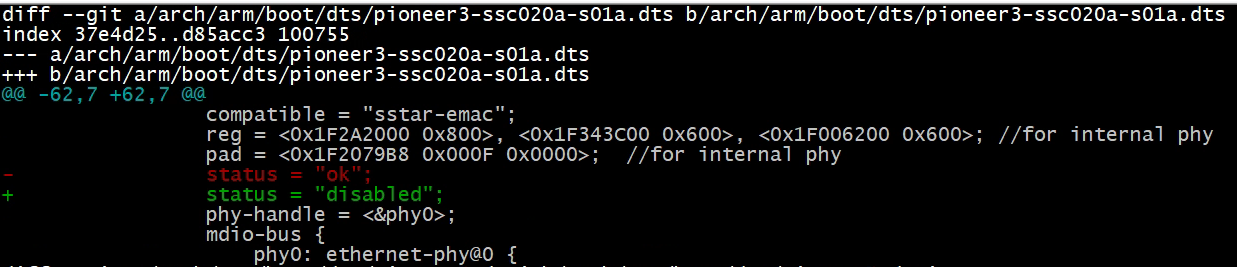
-
Modify Dts
Emac: “sstar-emac”
1.4. USB
Adjust U-Boot and Linux Kernel to disable the component.
1.4.1. Adjust U-Boot
-
Deselect MSTAR USB

1.4.2. Adjust Linux Kernel
-
Power off the analog circuit.
Refer to 1.2.1 to enable CONFIG_ANALOG_PD_USB20_P1
-
Modify
linux-4.9/arch/arm/boot/dts/pioneer3.dtsi(set status = “disabled” to disable USB)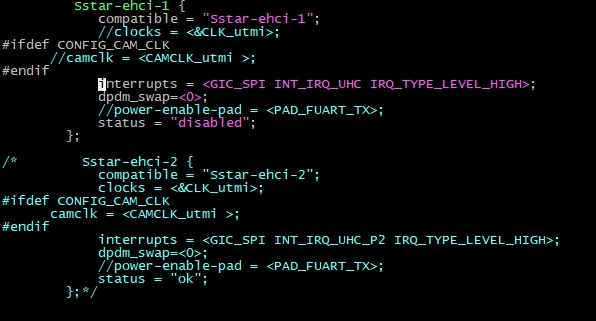
1.5. Audio
1.5.1. Adjust Linux Kernel
-
Power off the analog circuit
Refer to 1.2.1 to enable CONFIG_ANALOG_PD_AUDIO
-
Modify Dts
Audio : Set "sstar,audio" to disable it.

1.5.2. Set Project Config
Disable the following items:
--> SDK config
--> Interface Compile Config
    --> ai
    --> ao
--> SDK config
--> Mhal Compile Config
    --> aio
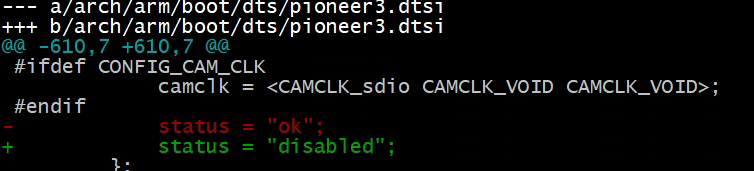
1.6. SDCARD
1.6.1. Adjust Linux Kernel
-
Modify
linux-4.9/arch/arm/boot/dts/pioneer3.dtsiSet "sstar,sdmmc“ status = “disable” to disable SD card.
1.7. Sensor
Note: Only for SSD22x.
If you don't need a sensor or it is not a MIPI sensor, you can disable it.
1.7.1. Adjust Linux Kernel
-
Power off the analog circuit.
Refer to 1.2.1 to enable the following items:
CONFIG_ANALOG_PD_MIPI_DPHY_RX_TOP
CONFIG_ANALOG_PD_MIPI_DPHY_RX_SRIO0_3
CONFIG_ANALOG_PD_MIPI_DPHY_RX_ SRIO4_7
1.7.2. Set Project Config
Disable the following items:
--> SDK config
--> Interface Compile Config
    --> venc         #JPE
    --> isp
    --> ispalgo
    --> sensor
    --> vif
    --> vpe
--> SDK config
--> Mhal Compile Config
    --> vcodec      #JPE
--> csi
    --> sensorif
    --> isp
    --> ispalgo
    --> ispmid
    --> ispscl
    --> vpe
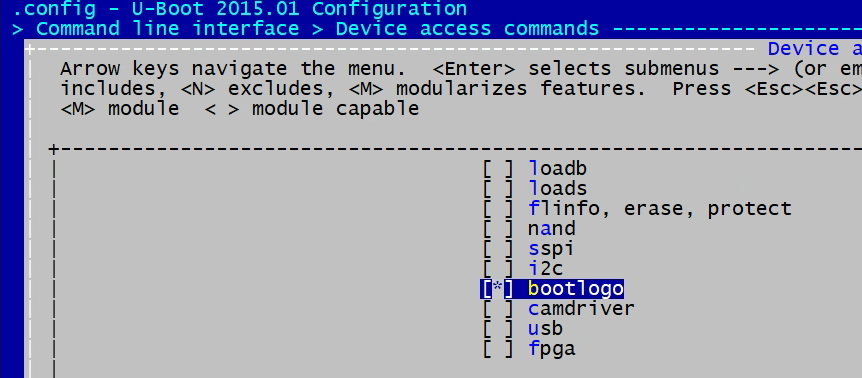
1.8. Display(Panel)
1.8.1. Adjust U-Boot
-
Deselect bootlogo.
1.8.2. Adjust Linux Kernel
-
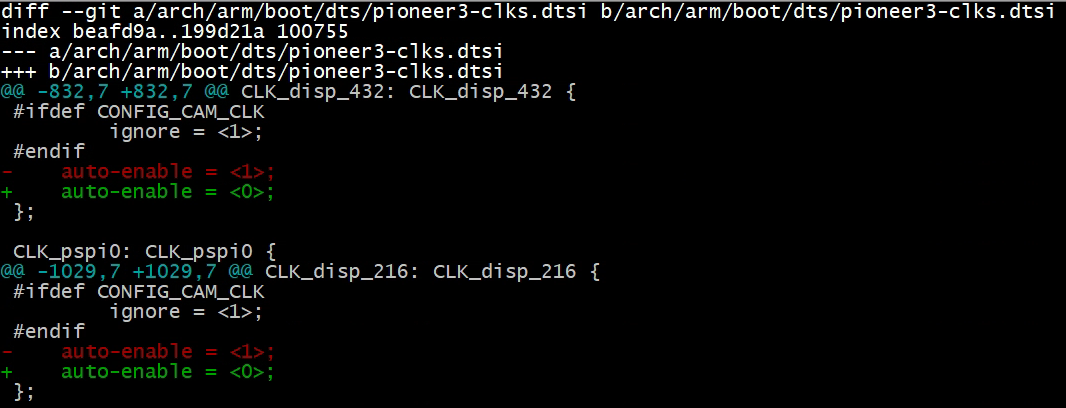
Power off the analog circuit.
Refer to 1.2.1 to enable CONFIG_ANALOG_PD_DISP_LPLL.
-
Modify Dts
Disp clk:
1.8.3. Adjust Project Config
Disable the following items:
--> SDK config
--> Interface Compile Config
    --> disp
    --> panel

--> SDK config
--> Mhal Compile Config
    --> disp
    --> panel
2. Component Clock Frequency Config
2.1. CPU Clock Frequency Config
2.1.1. Clock scaling Config
-
The range of clock scaling can be set through the following commands.
echo s_min > /sys/devices/system/cpu/cpufreq/policy0/scaling_min_freq    (default 400MHz)

echo s_max > /sys/devices/system/cpu/cpufreq/policy0/scaling_max_freq    (default 1GHz)
Note: s_min, s_max unit is kHz.
The setting is valid when the corresponding frequency range of Dts is enabled.

-
Setting standards:
-
s_min ≤ s_max
-
s_min ≥ /sys/devices/system/cpu/cpufreq/policy0/cpuinfo_min_freq
-
s_max ≤ /sys/devices/system/cpu/cpufreq/policy0/cpuinfo_max_freq
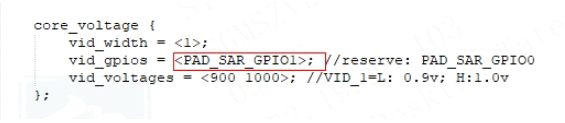
Note: When the cpu frequency changes, the corresponding core voltage must be adjusted. Currently, the gpio that adjusts the core voltage is not used for other purposes.
-
2.2. Encoding Clock Frequency Config
2.2.1. ISP Clock Frequency Config
After loading mhal.ko, before starting the video processing task, you can set the relevant frequency through the following commands:
-
Read the current isp clock rate
ccat /sys/class/mstar/isp0/isp_clk
Enable Clk:
echo 0 > /sys/class/mstar/isp0/isp_clk
There are settings as follows:
#echo 86400000 > /sys/class/mstar/isp0/isp_clk
#echo 123400000 > /sys/class/mstar/isp0/isp_clk
#echo 172800000 > /sys/class/mstar/isp0/isp_clk
#echo 144000000 > /sys/class/mstar/isp0/isp_clk
2.2.2. JPE Clock Frequency Gear
JPE clock default: 216M
Read: cat /sys/jpeg/jpe_clock
Write: echo 144000000 > /sys/jpeg/jpe_clock
Optional gear:
-
216000000
-
172400000
-
144000000
2.2.3. Note
The above settings should be set when the module is loaded in order to take effect correctly.
2.3. DDR Clock Frequency Config
DDR config needs to change IPL, please ask FAE to evaluate and assist in publishing.