SSD_102 SDIO WIFI Verification
1. Hardware
The hardware connection is as follows.
-
EVB
-
Only the nor flash has been verified, connect as shown in the figure below.

-
SDIO WIFI connection is as follow.

-
-
Demo Board
Verify NOR and NAND FLASH.


2. Software
The content to be modified is as follows:
-
EVB
-
Modify path
kernel\arch\arm\boot\\dts\pioneer3.dtsi. -
Modify the following content.
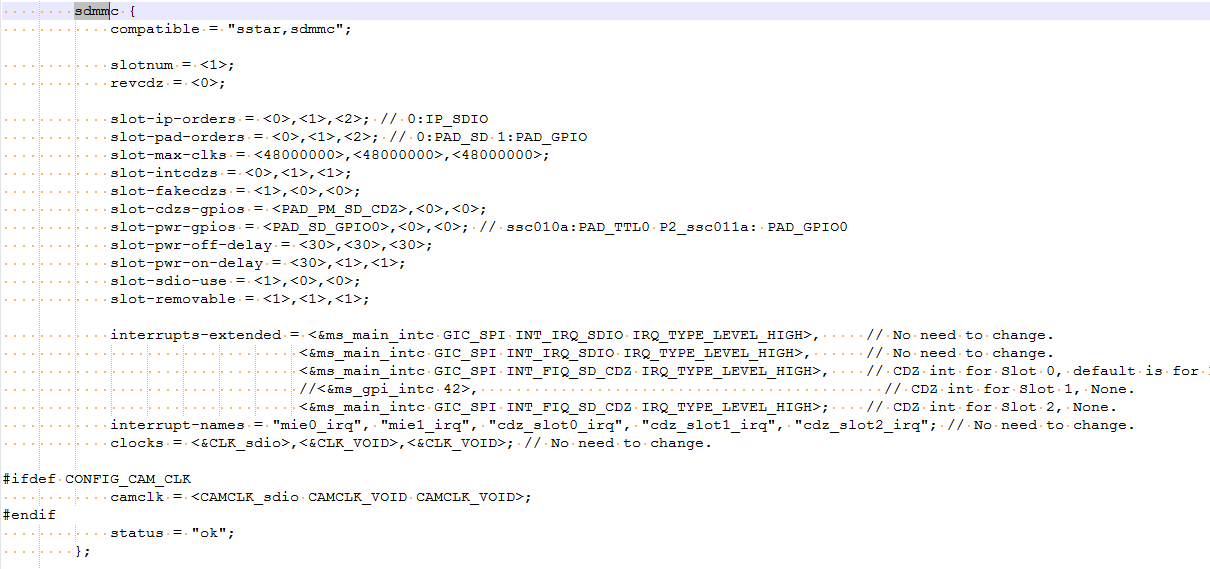
-
-
Demo Board
-
Modify path
kernel\arch\arm\boot\dts\pioneer3-demo.dtsi -
Modify the following content.

-
3. Config
-
EVB
make dispcam_p3_spinand.glibc-9.1.0-s01a.64.qfn128_defconfig
-
demo board
make
dispcam_p3_spinand.glibc-9.1.0-s01a.64.qfn128.demo_defconfig

make clean;make image-nocheck -j8
When compiling Ikayaki and Takoyaki:
-
Support multi-threaded compilation.
-
Compile the kernel simultaneously by default.
4. Burn Software
Refer to Environment Setup.
5. Verification
-
Check whether the sdio device is recognized normally.
Check the boot log, if there is the following print, it has been recognized normally.

-
Check whether the wifi related files are in the board.
Path:
/config/wifi.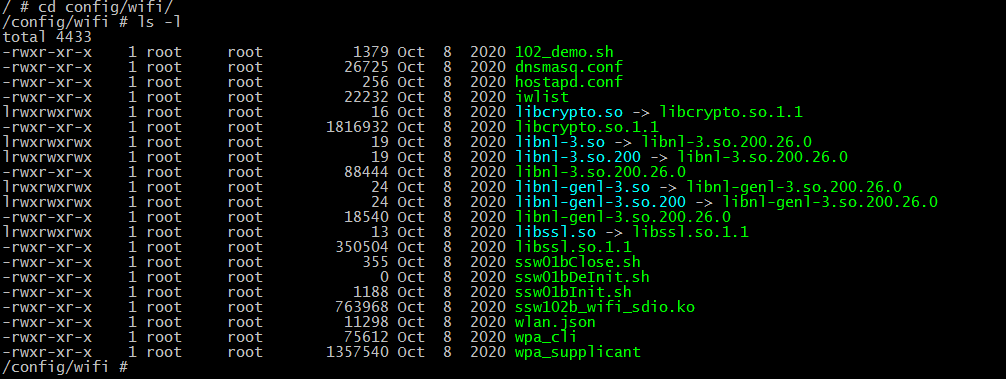
-
Modify the default connection file.
Modify vi /appconfigs/wpa_supplicant.conf:
network={

ssid="nova3"

psk="12345678"

}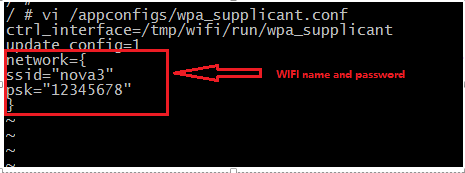
-
Run the following commands.
-
Execute
./102_demo.shin/config/wifi -
Connect to the wifi corresponding to
wpa_supplicant.confnormally. -
Use the command to test whether it is connected:
ping -I wlan0 14.215.177.39.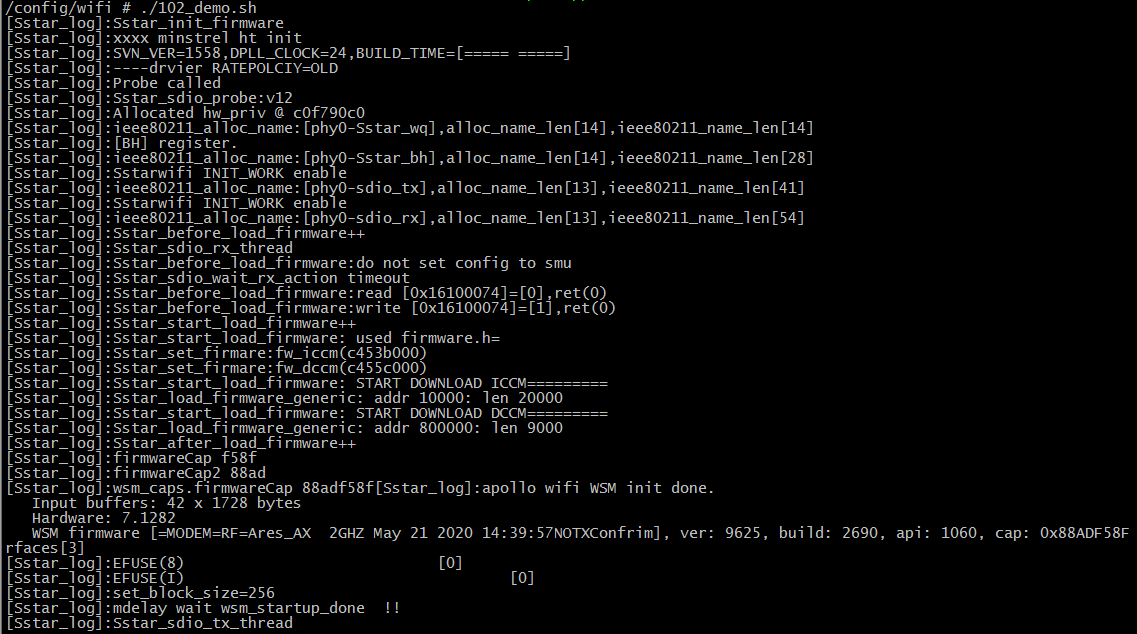
-
6. Verify AP Mode
Modifty the code based on the STA mode.
-
Path:
project\image\configs\rootfs.mk. -
Compile ap into the program.
The nor flash memory is small, and the program is not compiled into the program by default during development until it needs to be verified. After the functions are added, the program will be compiled into the program by default according to the usage of the nor flash partition.
-
Use the above configuration, recompile and burn the program.

7. Enable AP Mode
-
Execute the following commands.
export PATH=/config/wifi:$PATH
export LD_LIBRARY_PATH=/config/wifi:$LD_LIBRARY_PATH

touch /appconfigs/hosts
mkdir -p /tmp/wifi/run
chmod 777 /tmp/wifi/run
mkdir -p /appconfigs/misc/wifi/
mkdir -p /var/wifi/misc/
mkdir -p /var/lib/misc/
mkdir -p /var/run/hostapd/
rm -f /dev/random
ln -s /dev/urandom /dev/random
insmod ./ssw102b_wifi_sdio.ko
mdev -s

ifconfig p2p0 up
ifconfig p2p0 192.168.1.100 netmask 255.255.255.0

cd /config/wifi
./hostapd -B /config/wifi/hostapd.conf
./dnsmasq -i p2p0 --no-daemon -C /config/wifi/dnsmasq.conf &
-
Connect with another device.
ssid: ssw101bap
passwd: 12345678
You can modify the ssid and password of
hostapd.conf.