SSD_USB-RNDIS Reference
1. Overview
The ECM (Ethernet Networking Control Model) is used to transmit Ethernet packets between a device and a host. RNDIS is RemoteNDIS, which is a remote network driver interface specification and a USB network protocol defined by Microsoft based on ECM. This document will introduce the configuration and usage of rndis under Kernel and uboot respectively.
2. How to use RNDIS under KERNEL
Note: If RNDIS is used, the USB WIFI will not work
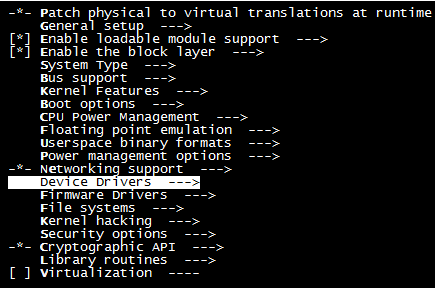
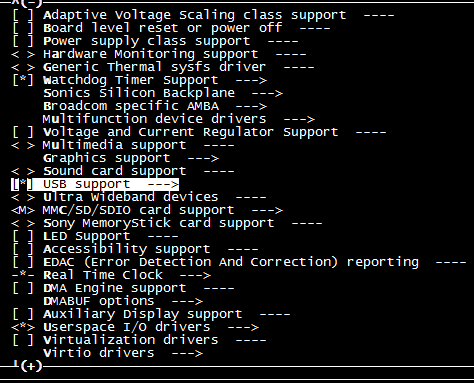
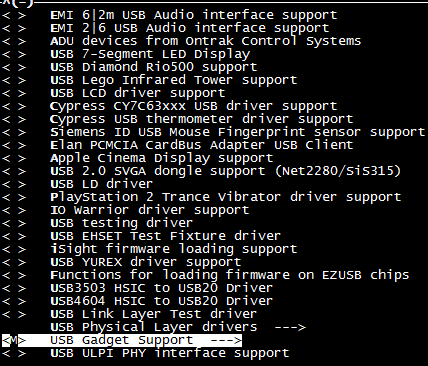
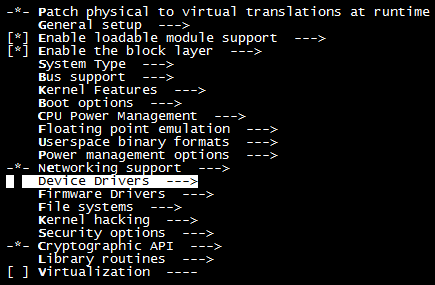
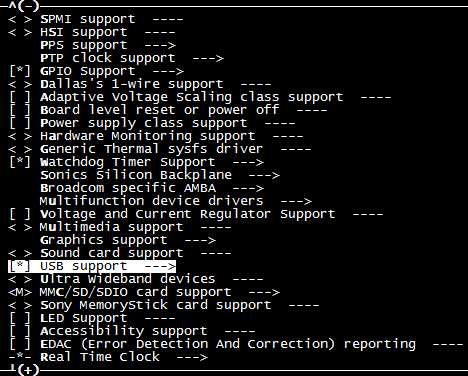
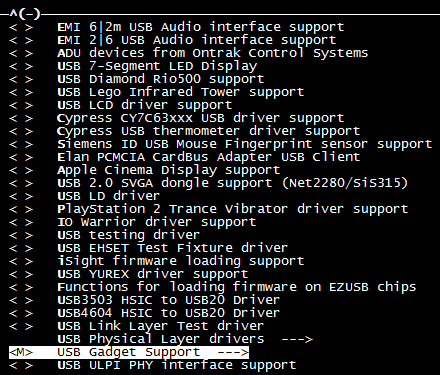
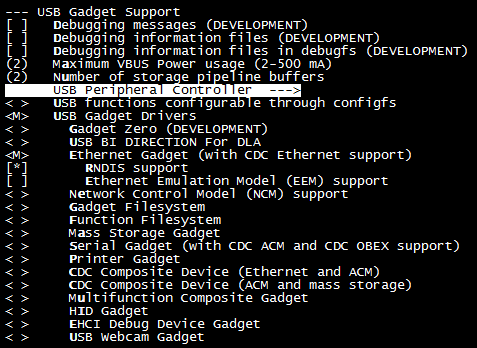
2.1. Configure Kernel Menuconfig
-
Enable Gadget Rndis Function
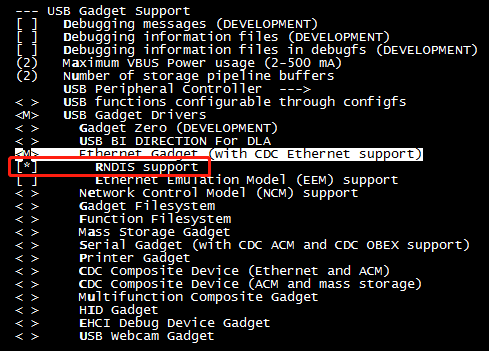
-
Enable Sstar USB 2.0 Device

(\< M> module, [ *]built-in, select all M to compile into module to generate ko, otherwise it is built-in, save and exit after configuration)
-
Add ko to the insmod sequence, and then compile the SDK
diff --git a/kbuild/customize/4.9.84/p3/dispcam/kernel_mod_list_late b/kbuild/customize/4.9.84/p3/dispcam/kernel_mod_list_late

index ca7284f..8ac16be 100755

--- a/kbuild/customize/4.9.84/p3/dispcam/kernel_mod_list_late
+++ b/kbuild/customize/4.9.84/p3/dispcam/kernel_mod_list_late
@@ -11,3 +11,11 @@ videobuf2-v4l2.ko
videobuf2-memops.ko
videobuf2-vmalloc.ko
uvcvideo.ko
+udc-core.ko
+libcomposite.ko
+u_ether.ko
+usb_f_ecm.ko
+usb_f_ecm_subset.ko
+usb_f_rndis.ko
+udc-msb250x.ko
+g_ether.ko,
Necessary ko:
udc-core.ko, libcomposite.ko, u_ether.ko, usb_f_ecm.ko, usb_f_ecm_subset.ko, usb_f_rndis.ko, udc-msb250x.ko, g_ether.ko
2.2. Start USB Ethernet on the Board
-
Load ko
Related ko will be loaded when the board is powered on.
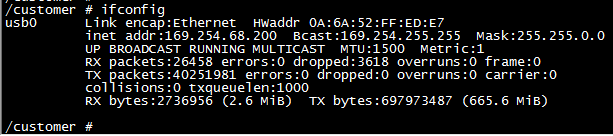
Start usb0 Ethernet after loading:
ifconfig usb0 up
-
Connect to PC
Use USB cable to connect the board and PC.
-
Set USB0 ip
ifconfig usb0 169.254.68.200 netmask 255.255.0.0
2.3. Install RNDIS Driver on PC
-
Right-click on the "Computer" icon on the desktop, select "Manage"-"Device Management", you can see the "RNDIS Kitl" device, which is in the driver not installed state.
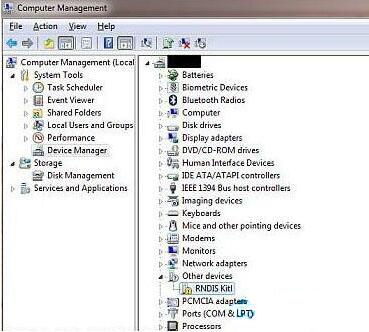
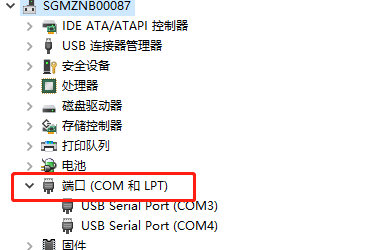
A new serial port is generated under the port.
-
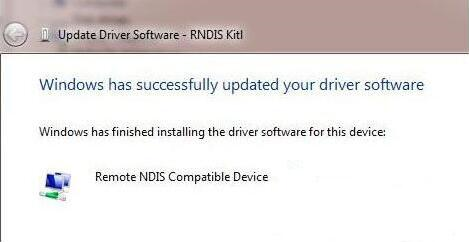
Right-click the device, select Update Driver Software, select "Browse My Computer" in the prompt window of searching device software, and select Install RNDIS driver.
-
Click Next and wait for the installation to complete. The RNDIS Kitl device is successfully installed.
-
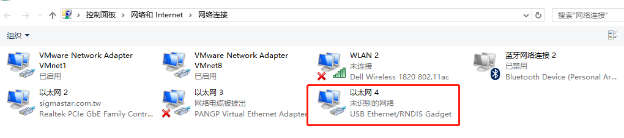
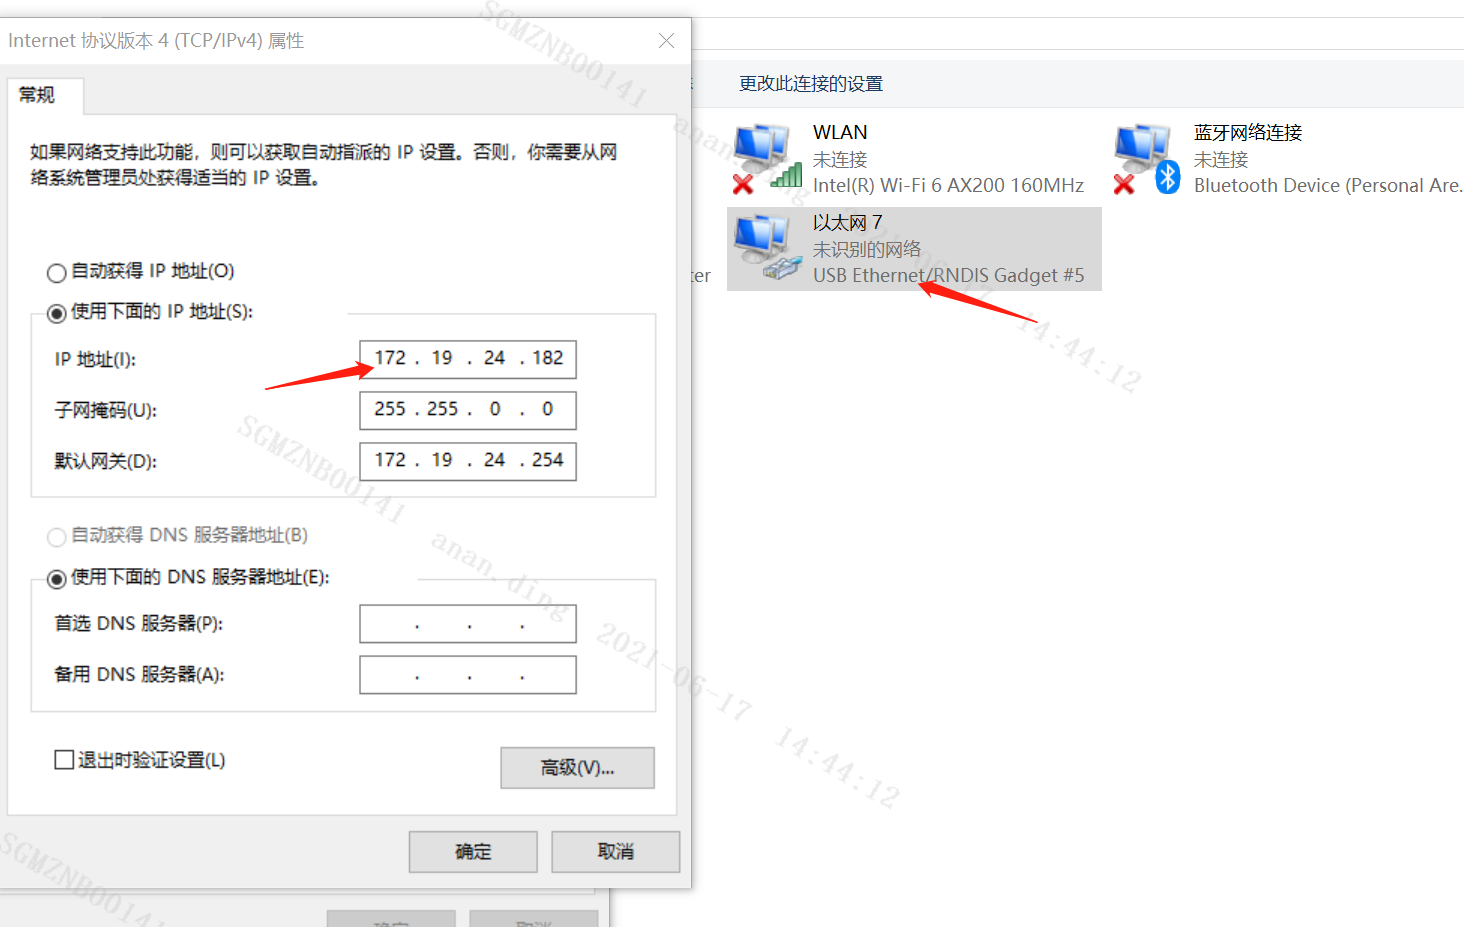
After the installation is successful, an Ethernet 4 will be added to the network connection.
Configure the ipv4 address and the board in the same LAN.
Note that when mounting, it is necessary to mount to the IP of this Ethernet connection, such as:
mount -t nfs -o nolock 172.19.24.182:/g/VDI_FTP /mnt
3. How to use RNDIS under UBOOT
3.1. Enable configuration
1. CONFIG_CMD_USBSTART
  -> Command line interface
    -> USB commands
      [*] usbstart

2. SSTAR_UTMI_POWERON
  -> Command line interface
    -> USB commands
      [*] Power on UTMI first
3.2. Configure environment variables
Enable usb device and enter the following command:
setenv usbnet_devaddr xx:xx:xx:xx:xx:xx
setenv usbnet_hostaddr xx:xx:xx:xx:xx:xx

setenv ethact usb_ether
setenv ipaddr 192.168.1.103
setenv netmask 255.255.0.0
setenv gatewayip 192.168.1.1
setenv cdc_connect_timeout 20
3.3. Computer Settings
The virtual network card will appear on the computer.
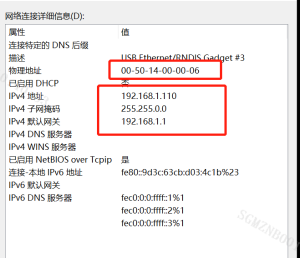
Change the advanced tab of the mac address in the configuration shown in the figure below (when the mac is changed, the display is incomplete, don't worry, just continue to fill in):
After configuration, view the connection status as shown below:
Ping 192.168.1.103 successfully on the computer indicates that the connection is successful.