USB-RNDIS Reference
1. Configure Kernel Menuconfig
-
Enable Gadget Rndis Function
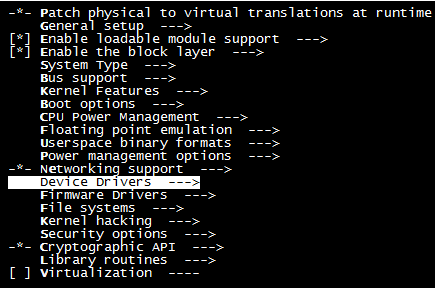
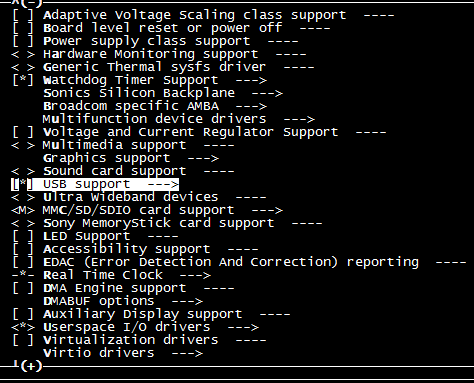
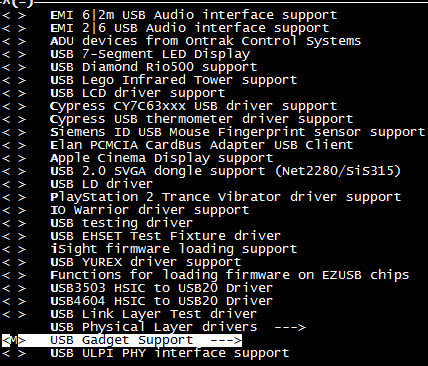
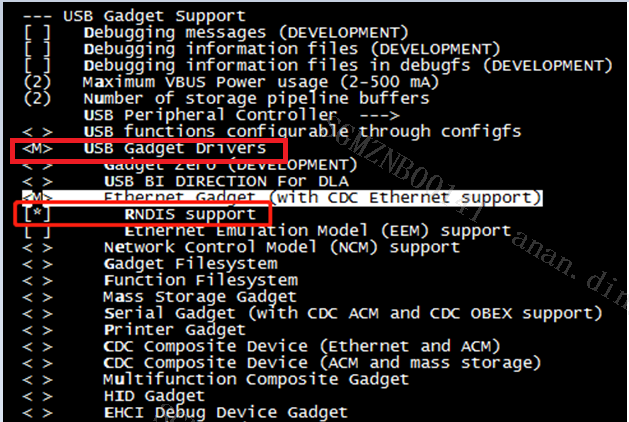
-
Enable Sstar USB 2.0 Device
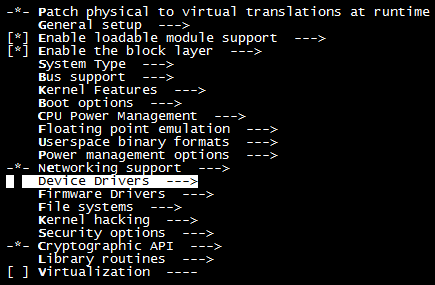
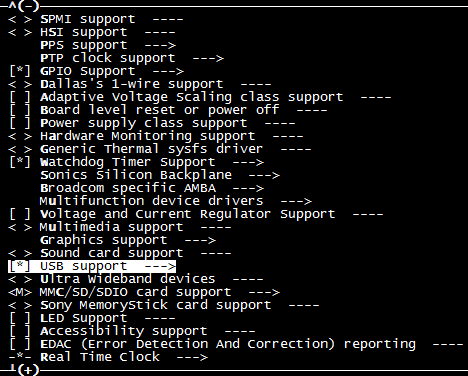
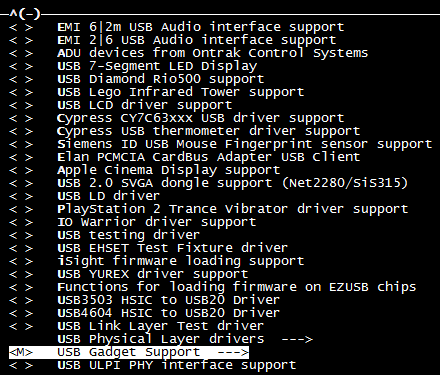


(\< M> module, [ *]built-in, select all M to compile into module to generate ko, otherwise it is built-in, save and exit after configuration)
-
Add ko to the insmod sequence, and then compile the SDK
diff --git a/kbuild/customize/4.9.84/p3/dispcam/kernel_mod_list_late b/kbuild/customize/4.9.84/p3/dispcam/kernel_mod_list_late

index ca7284f..8ac16be 100755

--- a/kbuild/customize/4.9.84/p3/dispcam/kernel_mod_list_late
+++ b/kbuild/customize/4.9.84/p3/dispcam/kernel_mod_list_late
@@ -11,3 +11,11 @@ videobuf2-v4l2.ko
videobuf2-memops.ko
videobuf2-vmalloc.ko
uvcvideo.ko
+udc-core.ko
+libcomposite.ko
+u_ether.ko
+usb_f_ecm.ko
+usb_f_ecm_subset.ko
+usb_f_rndis.ko
+udc-msb250x.ko
+g_ether.ko,
Necessary ko:
udc-core.ko, libcomposite.ko, u_ether.ko, usb_f_ecm.ko, usb_f_ecm_subset.ko, usb_f_rndis.ko, udc-msb250x.ko, g_ether.ko
2. Start USB Ethernet on the Board
-
Load ko
Related ko will be loaded when the board is powered on.
Start usb0 Ethernet after loading:
ifconfig usb0 up -
Connect to PC
Use USB cable to connect the board and PC.
-
Set USB0 ip
ifconfig usb0 169.254.68.200 netmask 255.255.0.0
3. Install RNDIS Driver on PC
-
Right-click on the "Computer" icon on the desktop, select "Manage"-"Device Management", you can see the "RNDIS Kitl" device, which is in the driver not installed state.
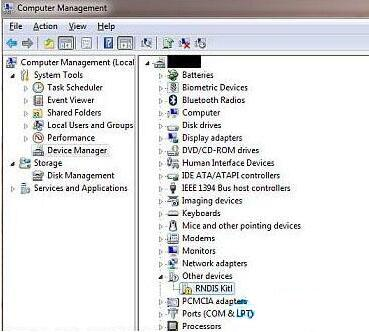
A new serial port is generated under the port.

-
Right-click the device, select Update Driver Software, select "Browse My Computer" in the prompt window of searching device software, and select Install RNDIS driver.
-
Click Next and wait for the installation to complete. The RNDIS Kitl device is successfully installed.

-
After the installation is successful, an Ethernet 4 will be added to the network connection.

Configure the ipv4 address and the board in the same LAN.
